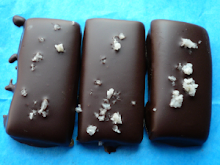
In the interest of keeping everyone's attention and perhaps attracting some more, I'm going to add a few new features.
First of all, if you'll visit the website, you'll find a poll. My brain is full of new flavors, but I'd like your input. So go to the website and give me your input!
Second, I'm going to start sharing some recipes and techniques. If there's something you'd like to see here, please comment or email, and I'll do what I can. In that spirit, here's the first recipe!
French Brownies (adapted from Dorie Greenspan "Baking: From My Home to Yours", Houghton Mifflin, 2006- via the NY Times)
Preheat the oven to 300℉. Line an 8 x 8 pan with foil and spray with cooking spray or very lightly brush with butter.
You will need:
10 tablespoons butter, cut into pieces
1/2 cup all-purpose flour
1/8 teaspoon salt
4 ounces bittersweet chocolate, chopped
2 ounces unsweetened chocolate, chopped
3 eggs
1 cup sugar
1/2 teaspoon vanilla extract
2/3 cup lightly toasted walnuts or hazelnuts (optional)
Melt the butter and the chocolates together in a bowl set over simmering water. Stir often to avoid burning. Set aside when melted.
Mix the flour and salt together, set aside.
In the bowl of a stand mixer, combine eggs and sugar, beat on medium speed until very fluffy and pale yellow. Alternately, mix eggs and sugar in a bowl and beat with a hand mixer until fluffy and pale yellow. (Alternately alternate - whisk eggs and sugar by hand, just be prepared to do it for a while - it helps if you're ambidextrous)
Add the chocolate mixture to the eggs, blend until well combined. (*if your chocolate mixture is too hot to touch, put it over a bowl of ice or some ice packs and stir until it is cooled - if not, you may end up with chocolate scrambled eggs)
Gently and quickly fold in the dry ingredients until no flour remains visible (the best way to fold: think of the bowl as a clock face; draw your spatula from 12 to 6, rotate the bowl a quarter turn, and repeat).
Pour batter into the prepared pan, bake for 50-60 minutes, until top is shiny and dry. Remove from oven, allow to cool before cutting (yeah, right, I always do that).
This recipe came from a fairly recent NY Times article about brownies. I've cut down on the butter very slightly and changed the chocolate ratio from all bittersweet to bittersweet and unsweetened. When I made them before modifying the recipe, I found them to be a little too buttery, and not chocolatey enough. If you want to try them the other way, add two tablespoons more butter and use 6 ounces of bittersweet chocolate.
Enjoy!
Showing posts with label recipes. Show all posts
Showing posts with label recipes. Show all posts
Tuesday, July 10, 2007


Thursday, May 24, 2007
Tempering Chocolate...the hard way.

I don't think many people understand the alchemical work that goes into making a beautiful, shiny piece of chocolate. Of course the big factories use machines to do all this work, and, on that scale, it would be impossible not to use a machine. But have you ever tried to melt chocolate and cool it back into something comparable? It's harder than it looks.
When I was a baby pastry chef, at the French Culinary Institute, I had a vague notion about tempering chocolate, although I'd only done it once - semi-successfully with a bag of Tollhouse chips. Tempering is so advanced that they didn't even broach the subject until I was halfway through my training. What followed was some sort of chocolate torture test.
There are three classic tempering methods: tabling, innoculation, and the ice bath method. Before we could move on, we had to master all three (or at least attempt). Now, innoculation and ice bath are both quite straightforward. The first involves melting 2/3's of the chocolate, and then stirring in the final unmelted 1/3 in order to introduce the proper crystals back into the chocolate. The ice bath method involves melting all the chocolate and then cooling it to the proper temperature over an ice bath.
But tabling is a different animal all together. First, one must begin with an impeccably clean surface - as large as possible. Next, melt the chocolate over simmering water. Don't forget to dry off the bottom of the bowl, or all will be lost before it's begun. Now comes the insanity. Take that bowl of expensive melted chocolate, and pour about half of it on the table. That's right, just pour it out. Using a bench scraper, push the chocolate around on the table. Be prepared to lose a good deal of this chocolate to the floor, your sleeves, hair, pants, etc. When whatever is left on the table has cooled, try to scrape it back into the bowl, stir it around and test it by putting a small amount on the back of a knife and waiting to see if it dries quickly to a glossy finish. If not (and it's probably not) try again!
Imagine that scenario played out simultaneously by twenty people standing side by side in rows of five. By the end of the day, very few of us had mastered our goal of tempering chocolate, but most of us were well covered in chocolate. After all of that, it's amazing that we all had the courage to try again the next day.
Subscribe to:
Posts (Atom)